Kitchen Backsplash Installation Toronto: The Complete 2026 How-To Guide
In the high-stakes world of Toronto home design, your kitchen backsplash isn’t just a wall protector; it’s the critical design bridge that defines the relationship between your custom cabinetry and those stunning quartz countertops. You’ve likely spent weeks agonizing over the perfect cabinet finish and stone slab, only to feel a wave of anxiety when it comes to the final tile layout. It’s completely normal to worry about messy grout lines or choosing a material that clashes with your investment. We believe your home should be a sanctuary, and every detail should reflect that sense of peace and pride.
This guide will empower you to master the art of kitchen backsplash installation Toronto homeowners are looking for, blending professional techniques with the latest 2026 design trends. Whether you’re drawn to the rising popularity of textured porcelain tiles or the light-reflecting qualities of glass mosaics, we’re here to help you navigate the process with confidence. We’ll preview the essential materials, break down professional installation steps, and clarify when you actually need a city permit versus when a project is considered a simple cosmetic upgrade. By the end of this article, you’ll have a clear path to a flawless finish that ties your entire kitchen together beautifully.
Key Takeaways
- Learn how to calculate the precise amount of tile needed for your project, including the vital 10-15% overage rule to prevent mid-renovation delays.
- Discover the professional secrets to a flawless kitchen backsplash installation Toronto homeowners trust, from meticulous wall preparation to dry-fitting for perfect alignment.
- Explore the leading 2026 design trends, including vertical stacks and herringbone patterns, that seamlessly bridge the gap between your custom cabinets and countertops.
- Master troubleshooting techniques for managing uneven walls and lippage, ensuring a level and professional finish even in older Toronto homes.
- Evaluate the benefits of expert-managed installation versus DIY to achieve the most durable, high-value outcome for your home sanctuary.
Planning Your Kitchen Backsplash Installation in Toronto
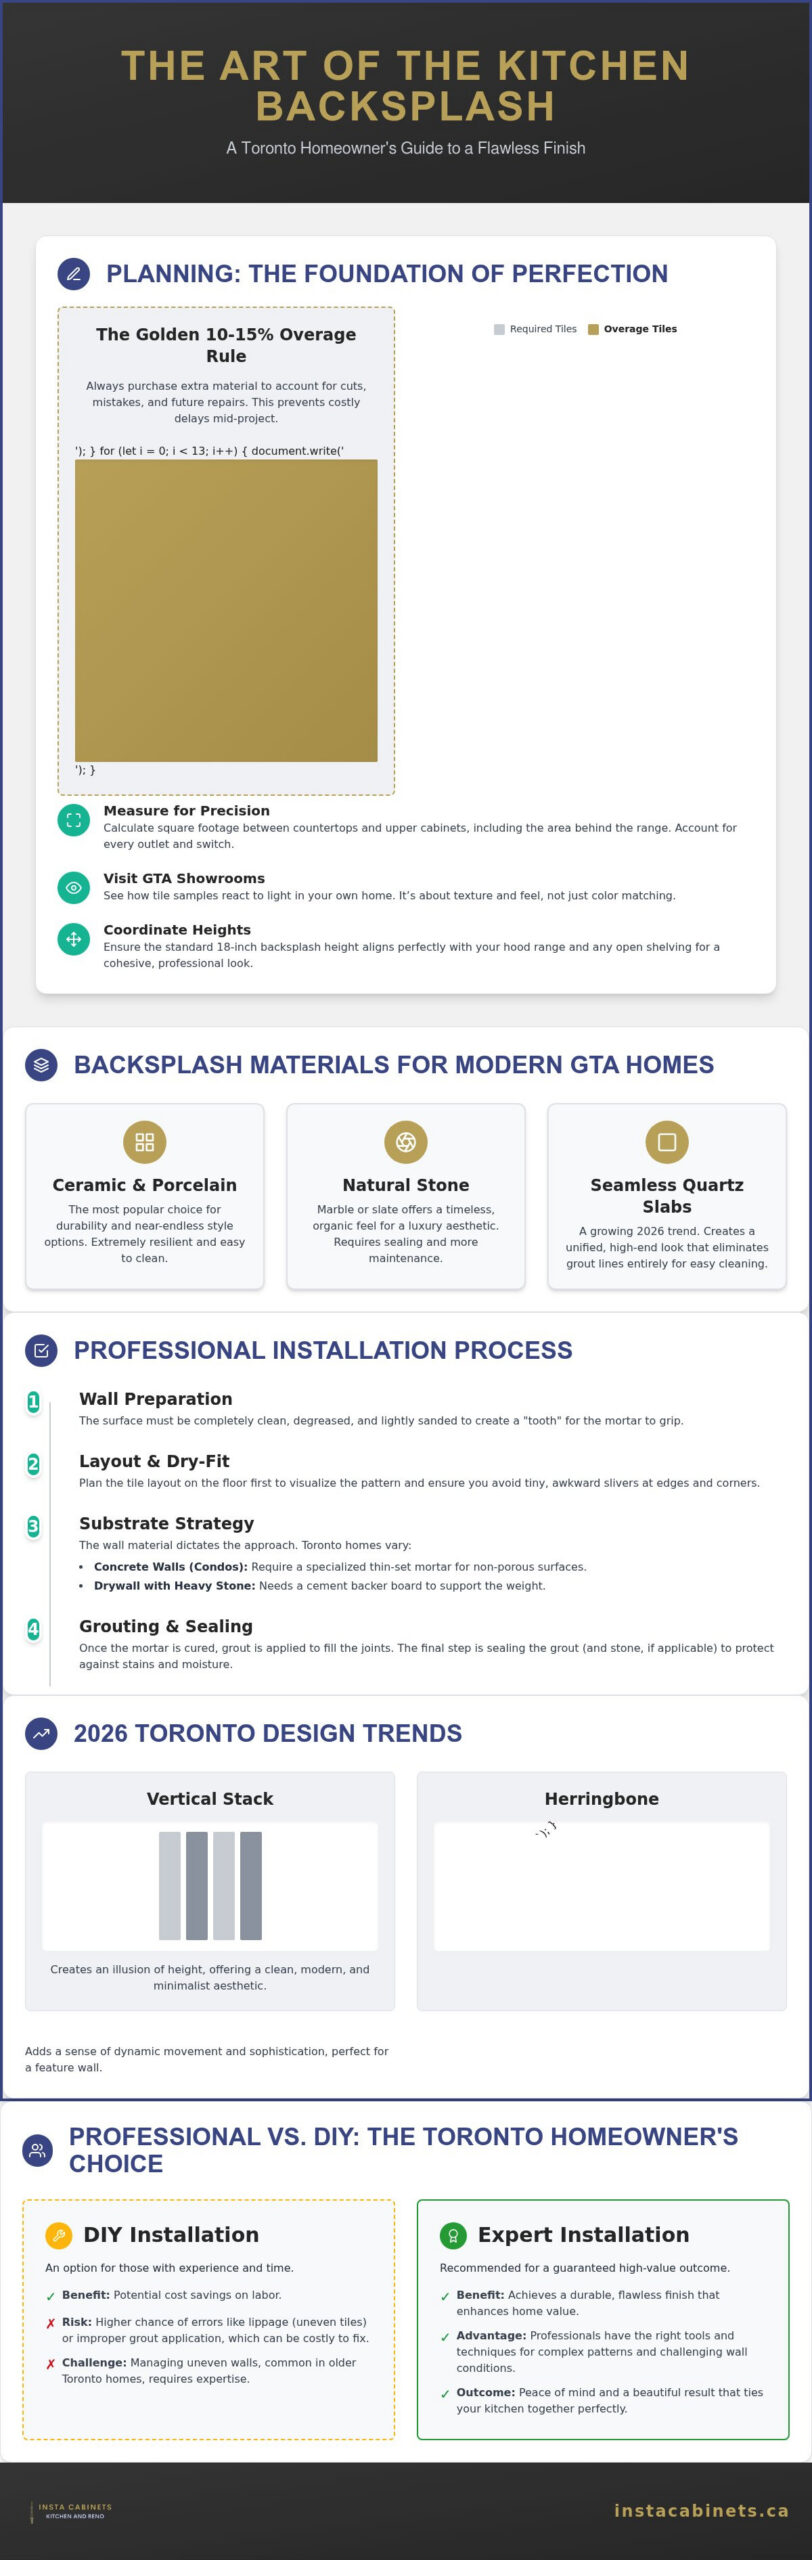
Planning a successful kitchen backsplash installation Toronto project starts long before the first tile is set. It’s the final flourish that bridges your beautiful cabinetry and work surfaces. When you start calculating your needs, the golden rule is the 10-15% overage. This extra material accounts for waste during cuts, especially around intricate corners or electrical outlets. We always suggest visiting local GTA showrooms to see how your chosen tile reacts to the specific lighting in your home. It’s about more than just a color match; it’s about the texture and how it complements your overall design. Coordinating the height is equally vital. Most backsplashes sit 18 inches above the counter, but you must align this with your hood range and any open shelving to ensure a cohesive, professional look.
Measuring for Success: The 2026 Standard
Precision is your best friend here. You need to measure every vertical and horizontal inch between your countertops and the underside of your upper cabinets. Don’t forget to account for the space behind the range, which often serves as the visual focal point. This area usually extends higher, sometimes reaching the ceiling or the bottom of a custom hood range. When measuring, count every electrical outlet and switch plate. These require precise cuts that can consume more material than you might expect. If you’re opting for a vertical stack or a herringbone pattern, your measurements must be even more exact to ensure the pattern looks intentional and balanced across the entire wall. This level of detail prevents awkward slivers of tile at the edges of your sanctuary.
Backsplash Materials for Modern GTA Homes
Choosing the right material is a deeply personal decision that balances aesthetics with daily durability. Ceramic and porcelain remain the most popular choices in Toronto because they’re nearly indestructible and come in endless styles. For those seeking a luxury high-rise aesthetic, natural stones like marble or slate offer a timeless, organic feel, though they do require more maintenance. A growing trend for 2026 is the use of seamless quartz slabs. These are often installed alongside custom kitchen cabinets to create a unified, high-end look that eliminates grout lines entirely. This approach creates a sense of calm and continuity, turning your kitchen into a true sanctuary. When budgeting for your kitchen backsplash installation Toronto, ensure your plan accounts for both the material cost and the specialized labor rates typical in the Toronto market.
Step-by-Step: How to Install a Kitchen Backsplash Properly
Achieving a professional result in your kitchen backsplash installation Toronto project requires a methodical approach that prioritizes preparation over speed. Your walls must be completely free of grease, dust, and old adhesive. We recommend a thorough degreasing followed by light sanding to create a “tooth” for the mortar. Once the surface is ready, you must plan your layout. Dry-fitting your tiles allows you to visualize the final pattern and adjust the starting point to avoid those tiny, awkward tile slivers at the edges of your cabinets. This stage is where your vision truly begins to take shape, turning a simple wall into a centerpiece of your home sanctuary.
Substrate Preparation: Drywall vs. Concrete
Toronto’s housing landscape is incredibly diverse. If you live in a modern downtown condo, you’re likely working with concrete walls rather than standard drywall. Concrete requires a specialized thin-set mortar designed for non-porous surfaces to ensure your backsplash doesn’t shift over time. For homeowners installing heavy natural stone like marble or slate, a cement backer board is often necessary to support the weight. Ensuring a perfectly level substrate is critical for a seamless integration with your cabinets and designs. If the thought of managing these technical details feels overwhelming, remember that a professional kitchen renovation team can handle every cut and grout line for you.
Cutting Techniques for Complex Patterns
The difference between a DIY look and a professional finish often comes down to the quality of the cuts. A manual snap cutter works perfectly for simple ceramic subway tiles. However, if you’ve chosen dense porcelain or delicate glass, a diamond-blade wet saw is essential to prevent chipping. You’ll also need to master the art of “U-cuts” or “L-cuts” to fit tiles precisely around electrical outlets and switch plates. Taking the time to measure twice and cut once ensures your kitchen backsplash installation Toronto remains flawless and durable for years to come.
Applying the thin-set mortar with a correctly sized notched trowel ensures even coverage and strong adhesion. Set your tiles firmly into the mortar, using plastic spacers to maintain perfectly consistent grout lines. After the mortar has cured, usually for 24 hours, apply your grout with a rubber float at a 45-degree angle. Wipe away the excess haze with a damp sponge. Finally, once the grout is fully dry, apply a high-quality sealer to protect the surface from the splashes and spills of a busy kitchen. This final step guarantees that your new backsplash remains as vibrant and beautiful as the day it was installed.
Toronto Design Trends: Patterns and Styles for 2026
Toronto’s real estate market remains one of the most competitive in the country, and savvy homeowners know that the right finishes can make or break a sale. A high-quality kitchen backsplash installation Toronto project is often the most cost-effective way to boost your home’s value. It’s the visual anchor of the room. In 2026, we’re seeing a shift away from generic choices toward materials that tell a story of craftsmanship and personal sanctuary. Choosing premium materials like hand-glazed zellige or seamless stone slabs doesn’t just look better; it signals to potential buyers that the home has been cared for with a focus on quality and longevity.
The classic subway tile has undergone a sophisticated evolution. We call it the “Toronto Subway.” Instead of the traditional 3×6 offset pattern, local designers are opting for large-format tiles stacked vertically. This orientation draws the eye upward, making even compact city kitchens feel more expansive and modern. For those with open-concept layouts, herringbone and chevron patterns are incredibly popular. They add a sense of rhythmic movement that bridges the gap between the kitchen and the living area. If you’re looking for the ultimate in low-maintenance luxury, matching your backsplash to your quartz countertops remains a top-tier choice. It creates a sleek, monolithic look that is both striking and timeless.
Choosing Grout Colors to Enhance Your Tile
Grout is often an afterthought, but it’s the secret ingredient to a professional finish. Using a high-contrast grout, like charcoal with white tile, creates a bold, architectural frame around every piece. Conversely, matching your grout to your tile creates a seamless, expansive surface that feels calm and unified. We strongly recommend epoxy grout for busy GTA households. It’s highly resistant to stains and moisture, ensuring your kitchen backsplash installation Toronto remains pristine through years of family dinners and morning coffees.
Matching Backsplash with Custom Cabinetry
The most successful designs treat the backsplash and cabinetry as a single, harmonious unit. If you’ve chosen bold, dark cabinets, a neutral, textured backsplash can provide the perfect visual balance. For those planning a professional kitchen remodel in Mississauga, integrating these elements requires a keen eye for detail. Matte cabinet finishes pair beautifully with slightly glossy tiles to add depth without overwhelming the senses. This collaborative approach between your storage and your walls is what transforms a standard renovation into a bespoke masterpiece that truly feels like home.
When to Call a Professional for Repairs
Even with the best care, life happens. If you notice cracked grout or a loose tile, it’s often a sign of underlying movement or moisture infiltration. This is particularly common behind the kitchen sink where water can seep into the substrate. Replacing a single damaged tile is a delicate operation that requires removing the surrounding grout without chipping adjacent pieces. If you aren’t comfortable with a chisel and hammer, it’s best to call in the experts. If you’re planning a full update to your home sanctuary, you can schedule a kitchen renovation consultation to ensure your new space is built to last.
The Role of Caulking in Backsplash Longevity
Caulking is the unsung hero of a durable kitchen. While grout is used between tiles, you should always use 100% silicone caulk at the joint where the backsplash meets the countertop. This joint is subject to the most movement as your house settles. Unlike rigid grout, silicone remains flexible, preventing unsightly cracks and protecting your custom cabinets from water damage. For a high-end, professional finish, match the color of your caulk to your grout. This small detail creates a seamless transition that keeps your kitchen looking organized and expertly finished. Regularly inspecting and replacing old, peeling caulk is the easiest way to prevent mold and maintain a healthy home environment.
Professional Installation vs. DIY: The Toronto Homeowner’s Choice
Choosing between a DIY approach and hiring an expert for your kitchen backsplash installation Toronto is a pivotal decision in your renovation journey. While the allure of a weekend project is strong, the reality often involves a steep learning curve and a significant investment in specialized tools. You’ll need a diamond-blade wet saw, laser levels, and the patience to handle delicate glass or natural stone. A minor error in that first row can lead to a crooked finish that detracts from your beautiful quartz countertops. Professional installers bring the speed and precision necessary to protect your cabinetry investment. They ensure every tile is perfectly aligned and every grout line is crisp, which is vital for maintaining your home’s resale value in the competitive GTA market.
Complex patterns like herringbone or chevron require a level of mathematical precision that can be daunting for a first-timer. These designs add incredible movement to a kitchen, but they also leave zero room for error. A professional tile setter understands how to center these patterns so they look intentional and balanced across the entire wall. By choosing a managed installation, you avoid the frustration of wasted materials and the stress of a project that lingers for weeks. Instead, you get a guaranteed result that transforms your kitchen into the sanctuary you’ve always imagined.
Why Instacabinets is Your Toronto Renovation Partner
We believe your home renovation should be a collaborative and exciting experience. Instacabinets provides a seamless, turnkey service that bridges the gap between your custom cabinets and your new backsplash. Our team coordinates every detail, from sourcing premium materials to managing skilled tradespeople across Toronto, Mississauga, and Oakville. We don’t just install tiles; we integrate them into your overall design to create a cohesive, high-end look. This holistic approach ensures that your cabinets, counters, and walls work together in perfect harmony, handled by a reliable pair of hands you can trust.
Preparing for Your Installation Day
A little preparation goes a long way in ensuring a smooth installation day. Start by clearing your countertops completely and removing any small appliances or decor. It’s also wise to protect your kitchen floor with drop cloths or cardboard to prevent scratches from tools or foot traffic. If you live in a Toronto condo, remember to check your building’s noise bylaws and reserve the service elevator in advance to avoid delays. Once the work is finished, perform a final walkthrough with your installer to verify the grout consistency and ensure a clean, polished finish. This final quality check is the last step in securing a durable and stunning centerpiece for your home.
Elevate Your Toronto Home with a Flawless Finish
Transforming your kitchen into a personal sanctuary requires more than just high-end materials; it demands a vision that bridges the gap between your custom cabinetry and your walls. By mastering the nuances of planning and understanding the technical requirements of substrate preparation, you’re already ahead of the curve. Whether you’re embracing the 2026 trend of vertical stack tiles or opting for the seamless elegance of a quartz slab, your kitchen backsplash installation Toronto project is the final, defining touch of your remodel. It’s the detail that protects your investment and elevates your daily experience of the home.
Since 2018, Instacabinets has been a trusted partner for homeowners across Toronto and the GTA. We offer complete design-to-installation management, ensuring that every grout line and tile cut meets our standards of high-quality craftsmanship. You don’t have to handle the complexities of a renovation alone. Our team is here to provide the emotional support and technical expertise you need for a stress-free transformation. Book Your Custom Kitchen Consultation with Instacabinets Today and let’s start building the kitchen you’ve always dreamed of. Your perfect home sanctuary is closer than you think.
Frequently Asked Questions
How much does kitchen backsplash installation cost in Toronto?
Professional kitchen backsplash installation Toronto projects typically cost between $480 and $1,600 depending on the material and complexity. You can expect labour rates for a skilled installer to range from $80 to $125 per hour, or roughly $5 to $45 per square foot. If your renovation requires removing an old surface first, factor in an additional $3 to $6 per square foot. These figures reflect the current 2026 market rates for high-quality craftsmanship in the GTA.
How long does it take to install a typical kitchen backsplash?
A standard installation usually takes between one and three days to complete fully. The first day is dedicated to meticulous wall preparation and setting the tiles, followed by a mandatory 24-hour curing period for the adhesive. Grouting and final cleanup occur on the second or third day. This structured timeline respects your need for efficiency while ensuring the mortar bonds perfectly for a durable, long-lasting result in your home sanctuary.
Can I install a new backsplash over existing tile?
Installing a new backsplash over existing tile is generally not recommended if you want a professional, high-end finish. While it might seem like a shortcut, it adds unnecessary thickness that can interfere with electrical outlets and cabinet alignment. It also risks poor adhesion if the original tile is loose or greasy. Removing the old material ensures a level, reliable substrate for your new design, which is essential for the longevity of your kitchen backsplash installation Toronto.
What is the best backsplash for quartz countertops?
Textured porcelain tiles and matching quartz slabs are the leading choices for quartz countertops in 2026. Porcelain offers a beautiful contrast in texture, while a matching stone slab creates a seamless, monolithic look that feels incredibly modern and expansive. Both options are highly durable and non-porous. These materials ensure a cohesive look between your work surfaces and walls, turning your kitchen into an organized and stylish sanctuary.
Do I need to seal my kitchen backsplash after installation?
You should seal your backsplash if you have chosen natural stone or used standard cement-based grout. While glass and glazed porcelain tiles are non-porous, the grout lines between them are susceptible to staining from cooking oils and moisture. Applying a high-quality sealer is a critical maintenance step that protects your investment. For a truly low-maintenance experience, we often recommend epoxy grout, which is naturally stain-resistant and doesn’t require additional sealing.
What is the most popular backsplash tile in Toronto for 2026?
Textured porcelain tiles that mimic natural stone, linen, or concrete are the most popular choices for 2026. Toronto homeowners are also shifting toward bold mosaic patterns and iridescent glass to create unique, light-reflecting focal points. These materials are particularly effective in smaller city kitchens as they help bounce light and make the space feel more dynamic. They offer a perfect blend of modern durability and the personal expression today’s homeowners crave.
How do I choose between a tile backsplash and a slab backsplash?
Choose a tile backsplash if you want to introduce pattern, rhythm, or a specific texture like herringbone to your kitchen. Tile is incredibly versatile and allows for more architectural definition. A slab backsplash is the better choice if you prefer a minimalist, seamless aesthetic with no grout lines to clean. Slabs provide a high-end, unified look that feels like a single piece of art, perfectly complementing premium custom cabinetry.
Should the backsplash be installed before or after the cabinets?
The backsplash must always be installed after your cabinets and countertops are securely in place. This order is essential because the tile needs to sit perfectly flush against the countertop to create a tight, professional seal. Installing afterward also allows the tile setter to account for any slight variations in cabinet height or wall level. It is the final, definitive step that bridges all your kitchen elements into a single, harmonious design.